1. Remove the phillips screw that holds the door handle trim piece (under the door handle).
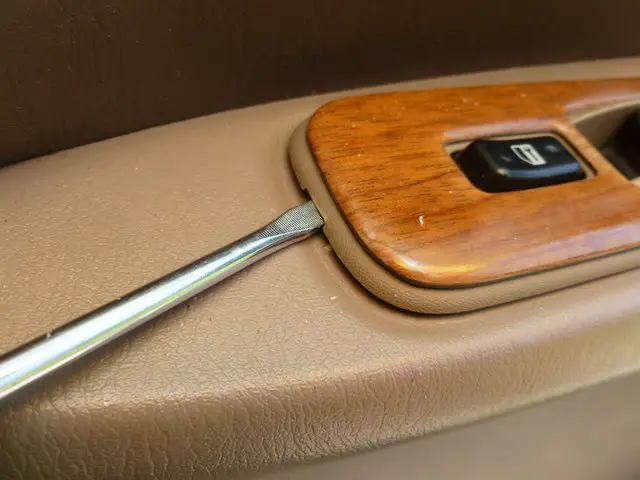
2. 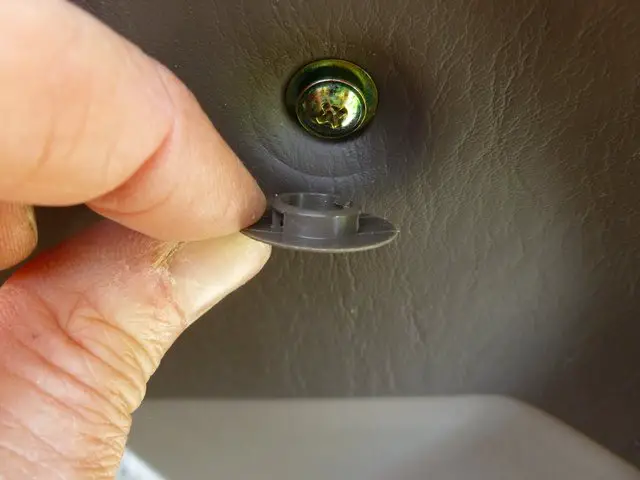 Remove the phillips screw at the upper front under the small round trim cap. Pry gently around all sides of the cap, prying a little more each time.
3. Remove the arm rest by forcing it up with a putty knife. Start with the end towards the front of the car. Start prying at the front edge and next to the door panel. The arm rest has two clips (one at front edge and one about three inches back). Once the two clips are loose, the arm rest flips toward you, which unhooks the back two prongs.
4. 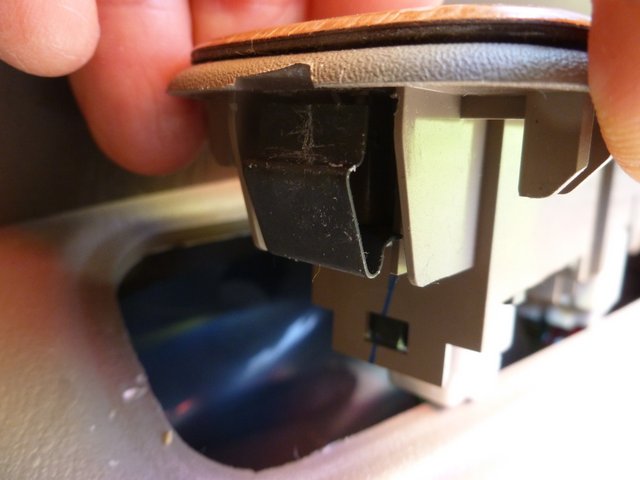
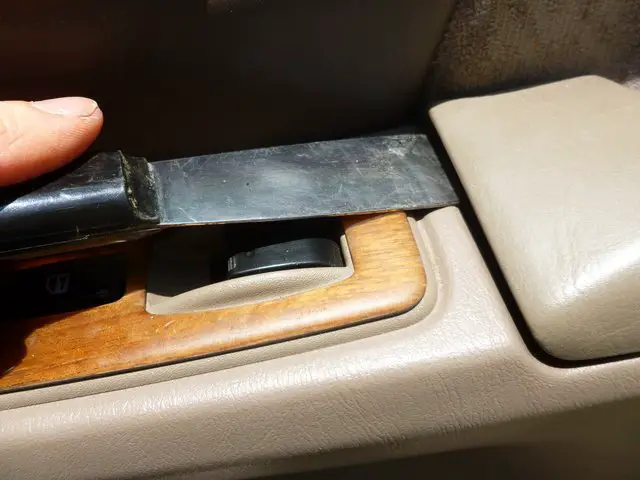
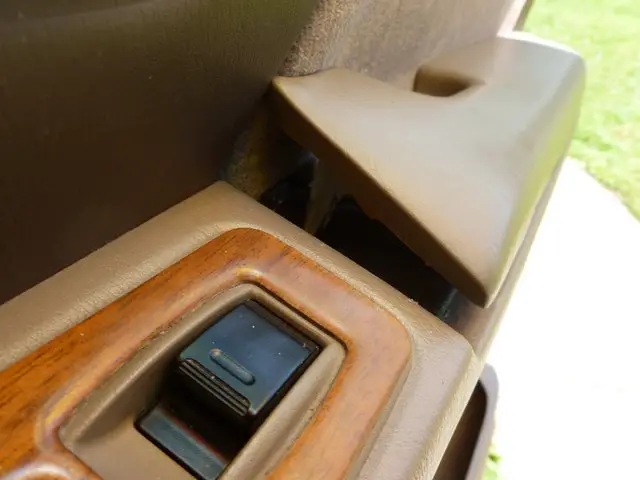
 Pry off the control panel. This trim piece has a metal clip that you need to press inward through a slot in the front edge (the metal clip is shown in picture 2). The back of the control panel has fixed clips, so unless you release the front clip it isn’t going to budge! Then, unplug the attached wires.
5. Now remove the 2 screws that appear once the arm rest is off. Pry the bottom of the panel away from the door starting at the bottom back corner (you will feel where there is resistance) and the plastic retaining clips will pop loose, one after the other.
6. Your panel should now be completely loose on both sides and the bottom, held on only by the door handle trim and the top lip (which is supposed to lift off).
7. The door handle trim is a little tricky. First of all, it’s held in place by two clips. One is directly over the lock switch and one is directly under it. Carefully pry underneath the trim in both of these locations and twist the screwdriver to pop off the clips. There is still a hook clip near the front of the trim, so to pull off the trim you have to pop out the two clips while pulling towards the rear of the car since the hook clips slide out towards the rear.
8. Once that is off, it’s just a matter of lifting the whole panel up until it unhooks from the top of the door.
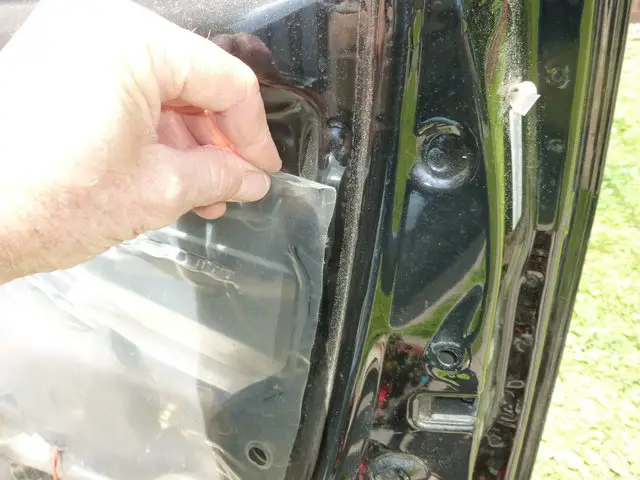
9. Gently remove the plastic film to give yourself access to the door handle from the inside.
10. Remove the small plastic cover from the hole in the edge of the door and then remove the 10 mm bolt that holds the door lock. You can let the door lock dangle there. Then, from the inside of the door, remove the other two 10mm bolts that hold the door handle in place, leaving the handle loosely in place.
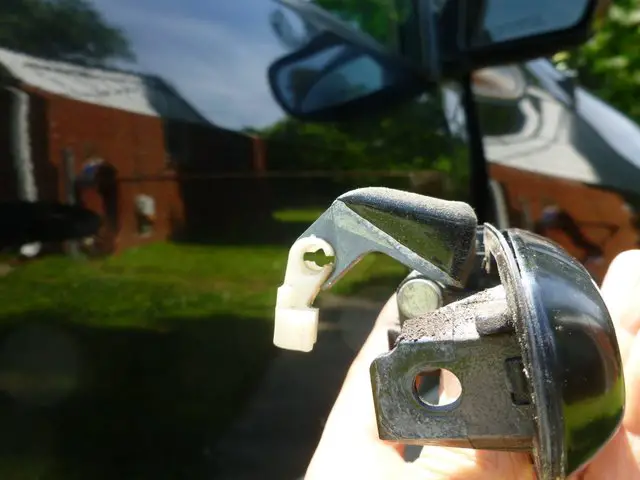
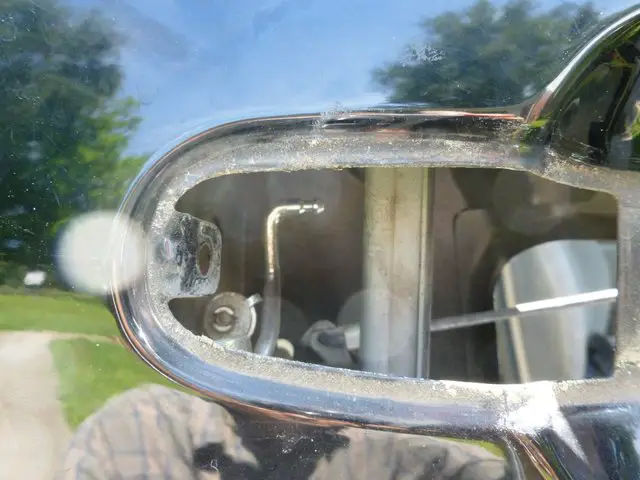
11. Now you can detach the connector rod from the door handle. Just swing the pivoting, plastic retainer clip away from the rod (from the position shown in picture 1 to the position shown in picture 2). This allows you to pull the rod (picture 3) out of the door handle lever.
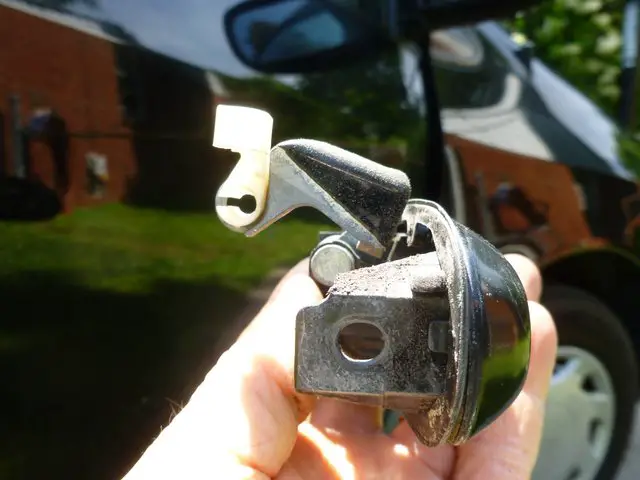
12. The broken door handle in now completely free and can be removed.
13. When bolting the new door handle in place you should work in the reverse order with the exception that I recommend you put the bolt in through the edge of the door to secure the lock in the handle first. Do not tighten the bolts until the connector rod is reconnected. Then I further recommend that you pull each bolt back out one at a time to put some medium strength thread lock on the bolt threads so that they will stay put once they are snugged in.
I hope that I have been a help to you. If you need any more help please leave a comment below.
Be the first to comment